Using the Navigation Bar in Flutter
In this article, we’re going to talk about adding a navigation bar to your Flutter app. Navigation bars are used to switch between the main three to five pages of your app. Typically the navigation bar is at the bottom of the screen within easy reach for the user’s thumb.
Check out a complete example on GitHub: minibuildsio/flutter_navigation_bar_example.
Creating a Navigation Bar
The main properties of the NavigationBar widget are:
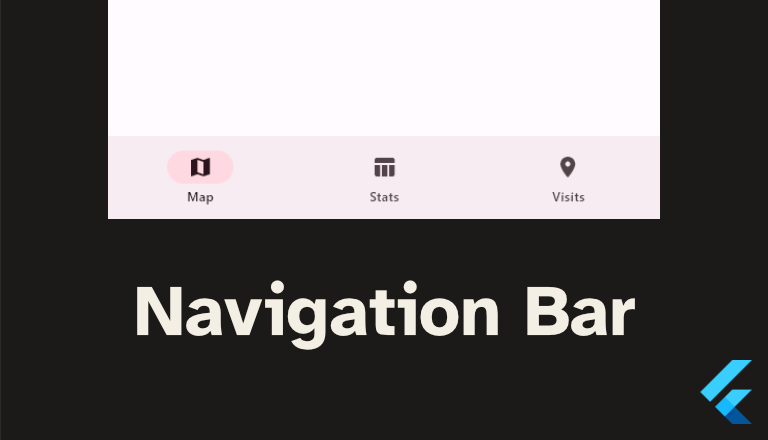
destinations: a list ofNavigationDestinationthat populate the items in the bar.selectedIndex: an int indicating which destination is active.onDestinationSelected: a callback when a destination is clicked so that you can update the state.
NavigationBar(
  destinations: const [
    NavigationDestination(
      icon: Icon(Icons.map),
      label: 'Map',
    ),
    NavigationDestination(
      icon: Icon(Icons.table_chart),
      label: 'Stats',
    ),
    NavigationDestination(
      icon: Icon(Icons.location_on),
      label: 'Visits',
    )
  ],
  selectedIndex: selectedIndex,
  onDestinationSelected: (index) {
    setState(() {
      selectedIndex = index;
    });
  }
)
Using a Navigation Bar in a Scaffold
A NavigationBar is a widget like any other so can be used anywhere, however, it is most commonly used as the bottom navigation bar of a Scaffold. This will pin it to the bottom of the screen so that the user can easily navigate between the main pages of the app with their thumb.
@override
Widget build(BuildContext context) {
  return Scaffold(
    body: ...,
    bottomNavigationBar: NavigationBar(
      ...
    ),
  );
Complete Navigation Bar in a Stateful Widget Example
Below is a complete example of using a NavigationBar. We’re using a StatefulWidget to keep track of the selected index i.e. the active page, you could another state management pattern by changing the onDestinationSelected callback. To switch between the different pages we’re using an IndexedStack widget which will display one of its children depending on the index provided e.g. when selectedIndex is one it shows the stats page.
class MainPage extends StatefulWidget {
  const MainPage({super.key});

  @override
  State<MainPage> createState() => _MainPageState();
}

class _MainPageState extends State<MainPage> {
  int selectedIndex = 0;

  @override
  Widget build(BuildContext context) {
    return Scaffold(
      body: SafeArea(
        child: IndexedStack(
          index: selectedIndex,
          children: const [
            MapWidget(),
            StatsWidget(),
            VisitsWidget(),
          ],
        ),
      ),
      bottomNavigationBar: NavigationBar(
          destinations: const [
            NavigationDestination(
              icon: Icon(Icons.map),
              label: 'Map',
            ),
            NavigationDestination(
              icon: Icon(Icons.table_chart),
              label: 'Stats',
            ),
            NavigationDestination(
              icon: Icon(Icons.location_on),
              label: 'Visits',
            )
          ],
          selectedIndex: selectedIndex,
          onDestinationSelected: (index) {
            setState(() {
              selectedIndex = index;
            });
          }
      ),
    );
  }
}