Godot Basics: Movement using character body
In this article, we’ll create a simple character that can move around and walk up slopes. The main node we’ll use is CharacterBody3D/2D a built-in node that handles controlling a user-controlled body, it provides an easy way to do common things like moving, detecting walls/slopes/ceilings, etc.
Check out a complete example on GitHub: minibuildsio/godot_movement_example
Mapping input events to game actions
To start let’s set up what input we want to use to control our character e.g. keys and joysticks. Godot allows us to map device input events such as the ‘WASD’ keys or a joystick to actions such as “move_left”, “move_right”, etc. To set up the input mapping go to the screen below, Project > Project Setting > Input Map. The configuration below maps the ‘A’ key or left on the joystick to move left, etc.
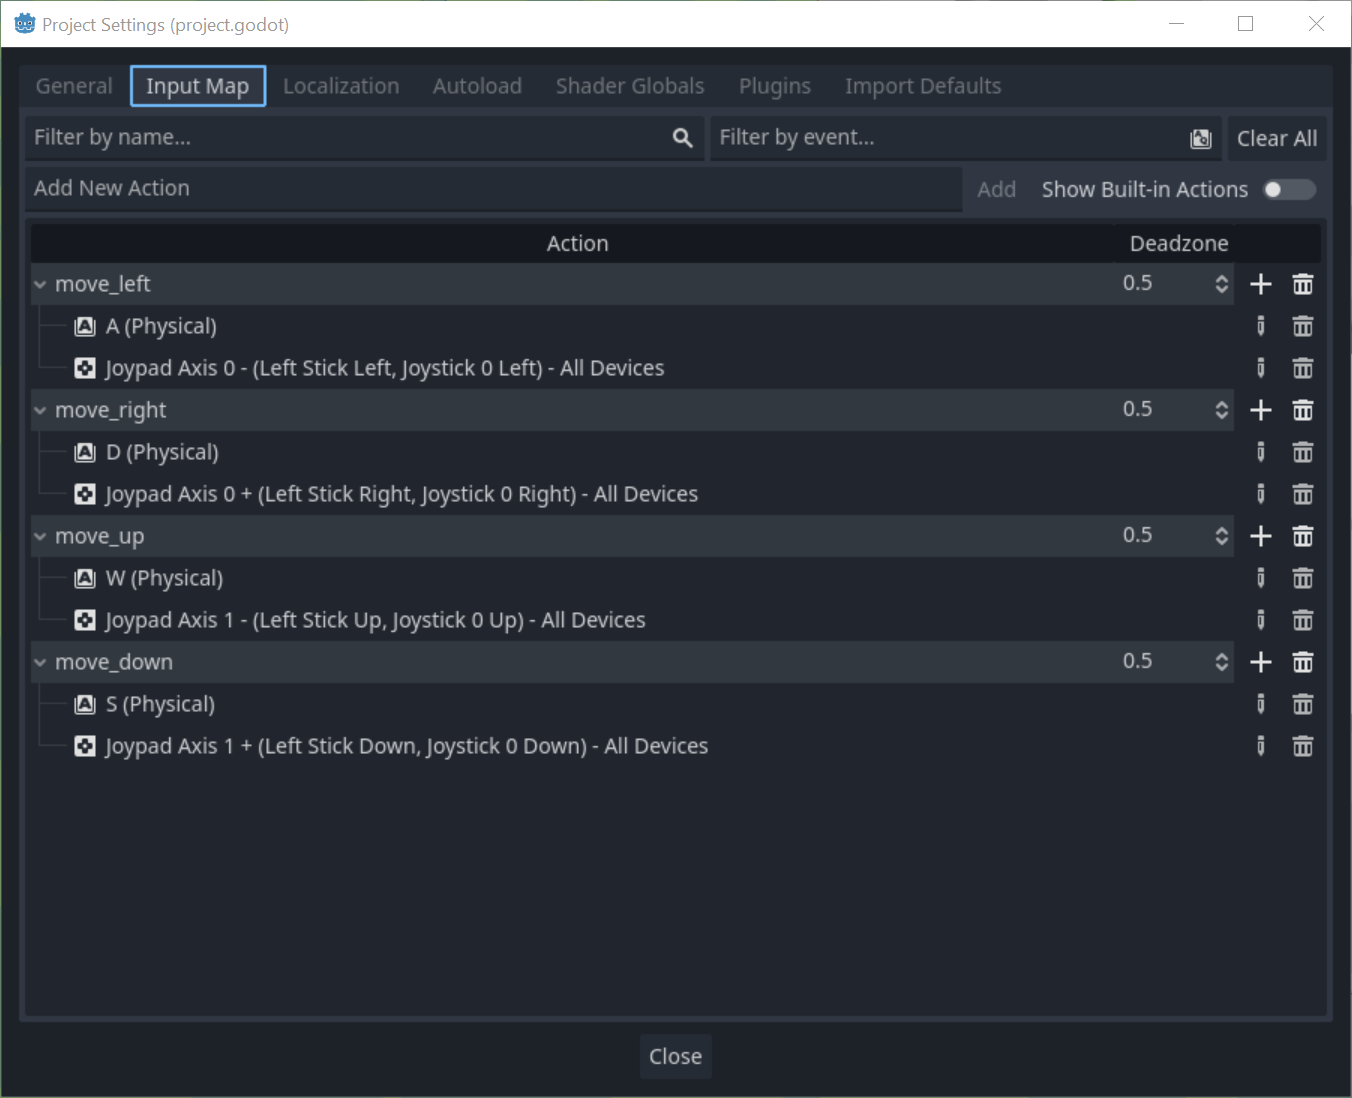
Pro tip: instead of searching for an event type such as the ‘A’ key simply focus on the “Listening for input…” textbox and enter the input. This works for joysticks too.
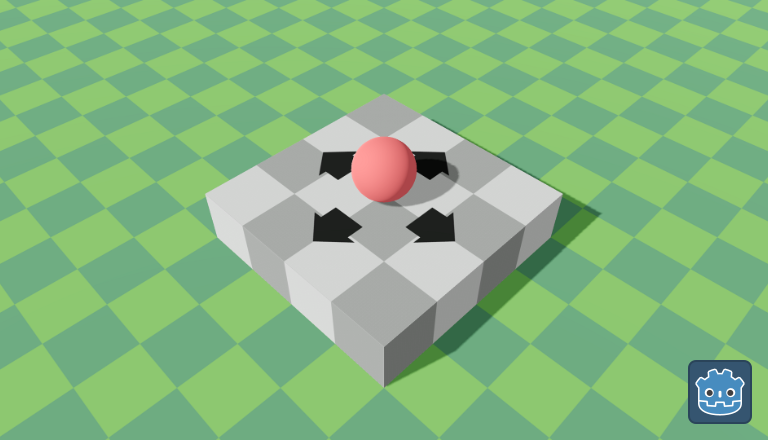
Scene set up
The scene contains:
- The player: a CharacterBody3D node with a sphere collision shape and sphere mesh.
- The ground: a large plane with a box collision shape.
- The ramps: ramps of different angles created in Blender.
Moving the character with move_and_slide()
The CharacterBody3D/2D node provides a function called move_and_slide which moves the character using the velocity field taking into account any collisions or slopes. Calls to move_and_slide should be made in the _physics_process callback which is called every physics step.
The code below calculates the velocity by passing the input actions mapped earlier to Input.get_vector(...) and then adds gravity. The final line calls the move_and_slide() function which changes the position using the velocity and time delta.
extends CharacterBody3D

@export var speed: float = 6
@export var gravity: float = 30

func _physics_process(delta):
	var velocity_floor = speed * Input.get_vector(
		"move_left", "move_right", "move_up", "move_down"
	)
	velocity = Vector3(velocity_floor.x, velocity.y - gravity * delta, velocity_floor.y)
	move_and_slide()
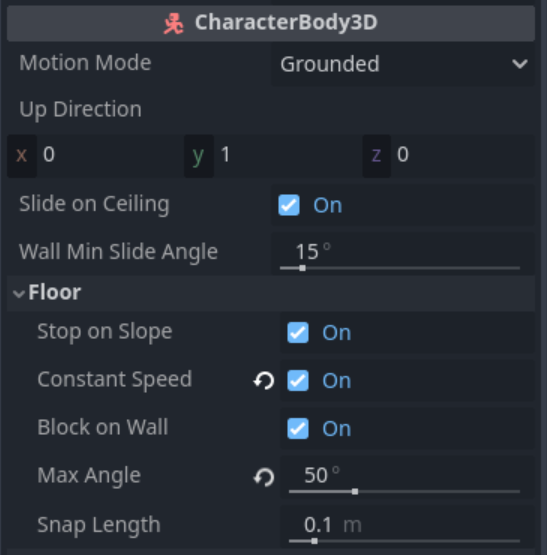
Character body customisation
Often, we need to customise the behaviour of the character, for example, change the max slope the character can climb before it’s considered a wall. Luckily, values to configure the behaviour can be changed in the Inspector e.g. “Max Angle” sets the maximum climbable slope angle.